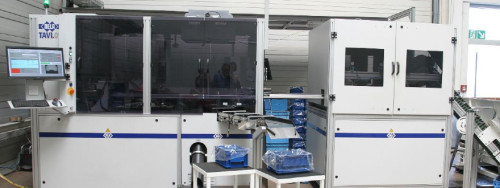
Dimensional and surface inspection on fine blanking parts

In 2016, German specialist for the production of high-quality fine blanking parts HAGO added a fully automated inspection and sorting system from NELA to its quality assurance department. Since then, several types of parts from HAGO’s serial production have been checked for dimensional correctness, as well as for surface defects.
Prior to meeting NELA, HAGO, who mainly supplies the automotive industry, relied on visual inspection for surface defects carried out by trained employees. But tighter quality requirements and larger batches lead management to re-think the entire quality assurance process.
Inspection from all sides with NELA TAVI.02
This is when NELA came into play and offered a TAVI.02 system with two glass tables for a highly precise dimensional control and additional defect inspection from all sides for a variety of different parts from HAGO’s broad production range. TAVI.02 features surface inspection sensors for parts with an outer diameter from 15 to 60 mm, while the measurement sensors can even capture parts with an OD of up to 80 mm. Specifically for HAGO’s requirements NELA implemented a part recognition feature that recognizes which side of a part is facing upwards so that the following sensor units can switch to the appropriate inspection program. Thanks to this feature, no parts have to be sorted out prior to inspection in order to be fed again with the “right” side facing upwards, which leads to a considerable increase in speed. Depending on the part to be inspected, the throughput of the TAVI.02 system is up to 5 parts per second. In addition to increased speed, the recognition feature assures that mirror-inverted parts are detected reliably.
Flexibility and precision
The NELA inspection system includes a feeder, the inspection sensors with image processing software, and the sorting station with statistical analysis of the inspection results. Changing the machine over to inspect another part takes only ten minutes. “NELA convinced us with their feasibility study and overall machine concept and all our requirements for the inspection have been fulfilled. We especially value the possibility to use TAVI.02 as a one-table-system, an option that provides us more flexibility for parts which – due to their size and/or shape – cannot be turned over mechanically” says Rainer Hack, Director of HAGO Feinwerktechnik GmbH.
In the beginning, the NELA inspection system had been designed for up to ten different types out of HAGO’s range of fine blanking parts. The inspection requirements were defined in close co-operation with the parts manufacturer. HAGO sent reference samples to NELA’s inspection lab to determine the exact specifications for the surface sensors to assure reliable detection of impact points, burrs, indentations and other damages. The repeatability of the measurements sensors is +/-10 µm over the entire visible area.
In the meantime, a number of additional parts have been added to the inspection algorithms of the system by HAGO staff. NELA offers remote or on-site support for such system amendments. “This keeps us very flexible and we can respond to the quality requirements of our customers” adds Mr. Hack. “And in addition to this, the NELA system provides us with a consistent inspection quality which we are more than happy to pass on to our customers.”
TAVI.02 enabled HAGO to fully integrate automated surface control into their quality assurance process and to eliminate the risks involved with “manual” control. Internal processes have been streamlined and the documentation and analysis options provide better information for continuous improvement of production steps.


